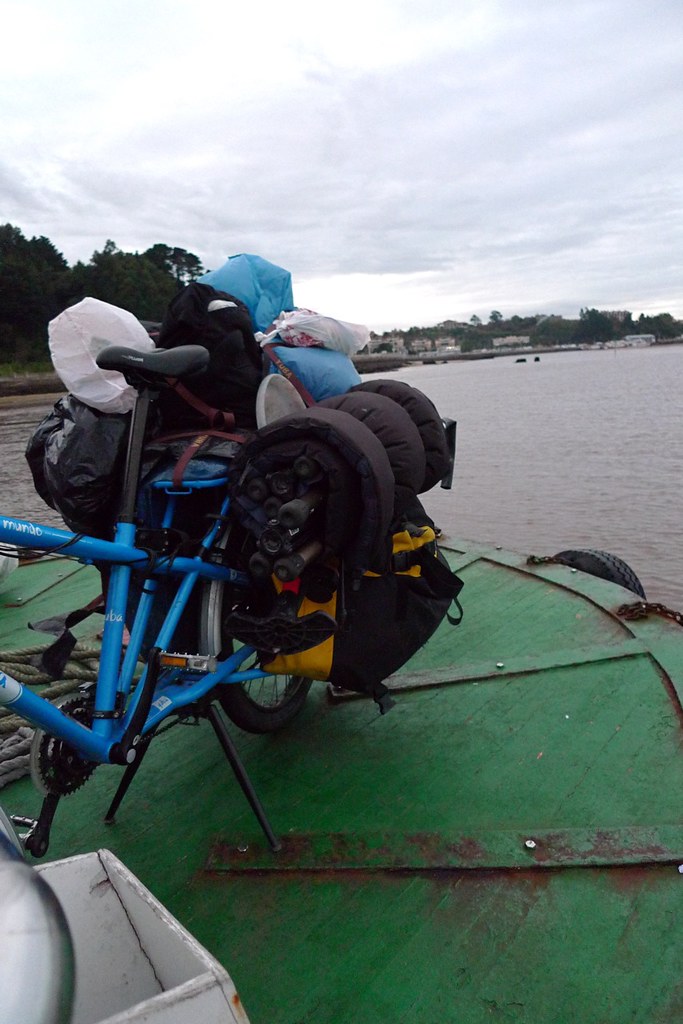
The StandAlone kickstand can be a life saver when loading kids and cargo. The photo below shows a StandAlone doing the job on a fully loaded Mundo on a moving ferry with no guardrail! That’s a dependable center stand.
But the performance of this stand relies on 4 bolts being correctly tightened. Due to the forces involved when parking your Mundo with a heavy load, these bolts can loosen over time. If the bolts are loose and you continue to ride and use the kickstand, they will continue to loosen and one or more can even fall out. Once a kickstand bolts falls out, the stand continues to work, but you may feel that the kickstand is ‘mushy’ or ‘sloppy,’ or that it can barely keep the bike upright, especially on a slope. A telltale sign is that the bike may feel fine when loaded heavily on one side but not the other.
First off: Get down and look!
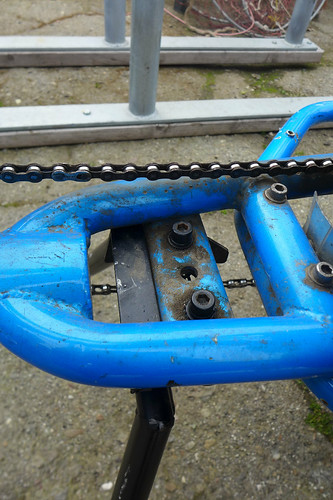
Now check the two pivot bolts on the sides. The image above shows the most obvious example, when a bolt has fallen out completely. If you don’t see an empty hole, you also need to look on the inside to make sure there’s a locknut on each bolt.
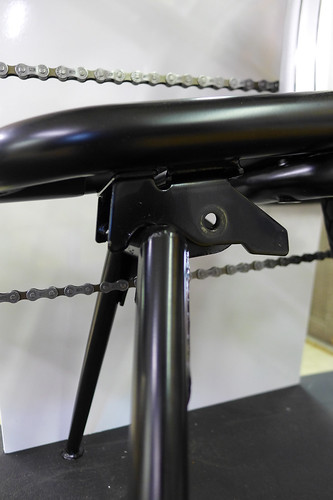
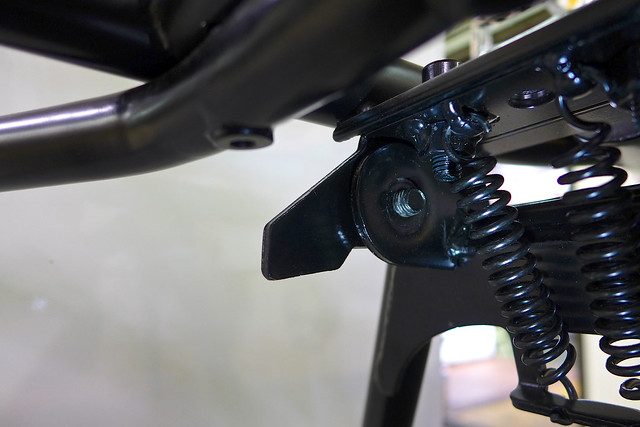 Here’s what it looks like if you have a missing locknut. See the bare threads on the pivot bolt. Bad!
Gather these tools:
- Flat head screw driver
- Phillips head screwdriver
- 2 open end wrenches of appropriate size for the nuts (probably 12mm or 13mm, cone wrenches are fine)
- Allen key wrenches of appropriate size for the bolt head (probably 5mm or 6mm)

You’ll also need the missing parts for your Center stand. You can get these from us for $0 from our online store: https://yubabikes.com/yubashop/yuba-maintenance/115-center-stand-repair-kit.html
You can also buy this hardware from a local hardware store. Each Stand Alone has two hinges, and each hinge needs the following parts:

- 1x M8 by 25mm long bolt or socket head cap screw
- 2x M8 nuts (using one normal, and one nylon-insert nut gives more resistance to loosening)
- 2x washers
or if you don’t have access to metric hardware, British Imperial fasteners can be used instead:
- 1x 5/16″ by 1″long bolt or socket head cap screw
- 2x 5/16″ nuts
- 2x washers
Step 1: Turn the bike upside-down. If one hinge bolt is being replaced, leave the SA attached to the bike and skip ahead to Step 3.
If both hinge bolts are being replaced, FOR SAFETY, close the stand so it’s in “riding” position on the bike and then remove the two bolts that mount the SA to the bike.
Step 2: Remove the springs
WARNING: THESE ARE STRONG SPRINGS, BE CAREFUL NOT TO GET PINCHED
To remove the springs, place a flat head screw driver into the coils of the spring, and pry up, releasing tension on the spring hook. Insert the philips head screw driver into the spring loop, and work it off the arch. Repeat for second spring.

Step 3: Apply some bike grease to the inside and outside of the hinge plates

Step 4: Insert the bolt(s)
If only one bolt is being replaced, and the springs are still attached, use the legs to manipulate the hinge and align the hinge holes.
Insert a bolt with a washer from the outside.
Put on a washer, and a nut on the inside. Turn the nut closest to the hinge down so it’s finger tight to the hinge and the right and left nuts are roughly equally threaded onto their bolts. Thread on the second nut (the nylon insert nut if you have one), using the alen key and wrench as necessary to snug it up to the first nut.

Step 5: Locking the nuts –
Using two wrenches, turn the bolts against each other firmly (like a threaded headset). The nylon insert nut should have it’s nylon engaged with the bolt threads – if it is not, loosen the two bolts, and turn them a closer to the hinge, then re-lock the nuts.

Step 6: Re-tension springs
Using a ball-end hex key as a lever, pry the spring hook over the arch, and re-seat the spring. Repeat for second spring.


Step 7: Reinstall stand on bike and open and close the SA to check that the motion is unrestricted and solid.
CONTACT US. [email protected]